SAP Logon Configuration(Load Balancing)
Logon groups (or work groups) are configured to dynamically distribute the load being processed by the dialog work processes. Setting up logon groups helps in uniform distribution of the work load across the available instances. While logging on using a logon group, the ABAP message server is contacted to identify the instance with best performance statistics within the selected logon group. A report runs in SAP every 5 minutes which determines the load across each server and updates in the memory area of the message server. This information will be used by SAP GUI to determine the best instance to distribute the next user.
SAP Logon Process
Let’s start with discussing an overview of SAP Logon process. High-level understanding of the process will help to explain details of SAP Logon configuration.
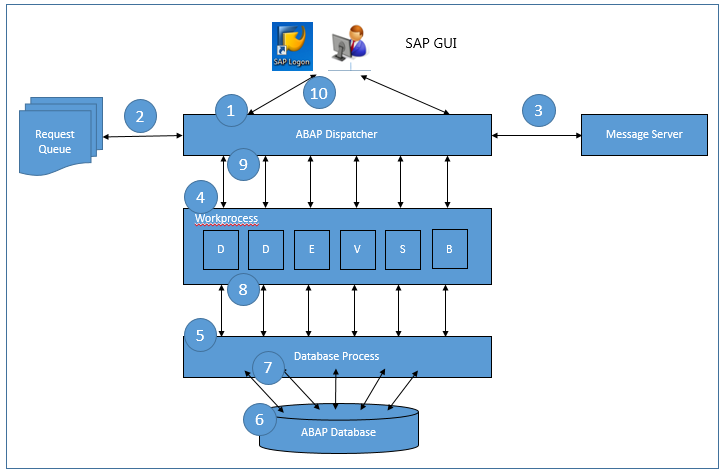
When user(s) accessing SAP system via SAP GUI, the request is forwarded into ABAP dispatcher for the direct logon. If SAP GUI is using logon group, the logon will be sent to the message server for purposes of logon load balancing.
Once the request is forwarded into ABAP Dispatcher, the request will be kept in the request queue first. Based on the concept of FIFO (First In and First Out), the dispatcher will find any free work process based on the user request type and assign it to the user. For example, for user login request, a dialog work process will be assigned if there are work processes available in the system.
Once the work process is assigned, it will check and compare logon user data (user id and password with the user master data which is stored in the database. If the logon user data is matching and in sync with stored user data in the database, it will return the positive result and allow the request in accessing the system. Otherwise, it will reject the request.
SAP Logon Configuration
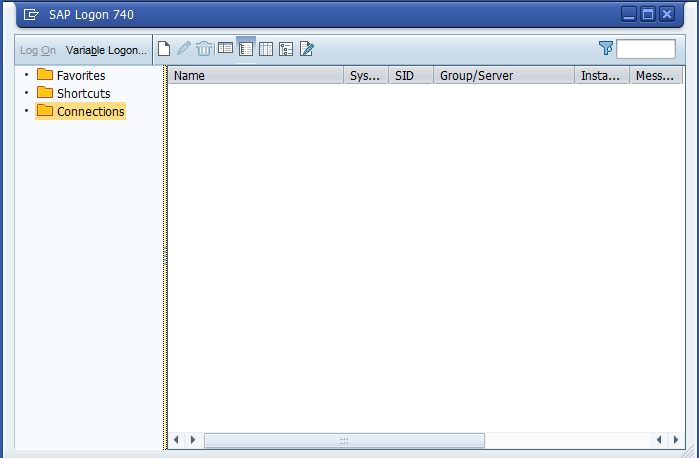
After SAP GUI installation and patching has been completed, the next step is to configure SAP Logon to connect to SAP system.
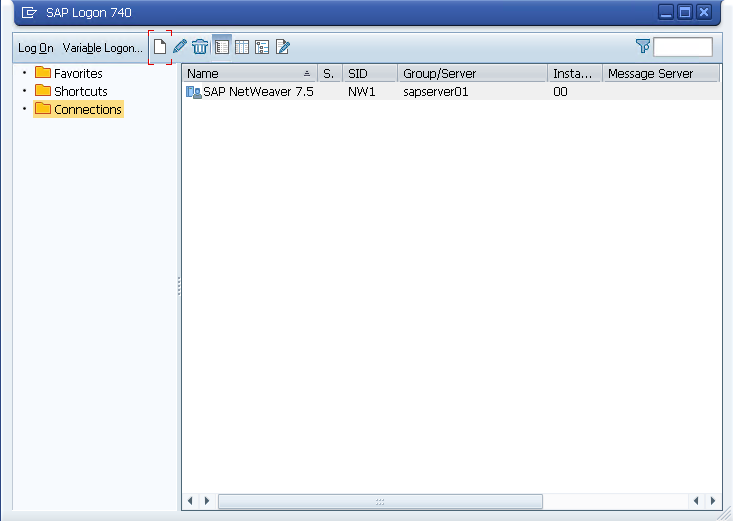
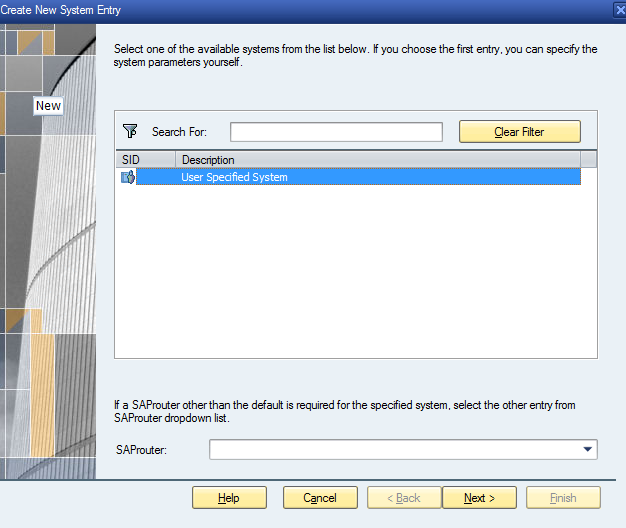
1. Click on Create button in SAP Logon as shown below:
2. Click Next button:
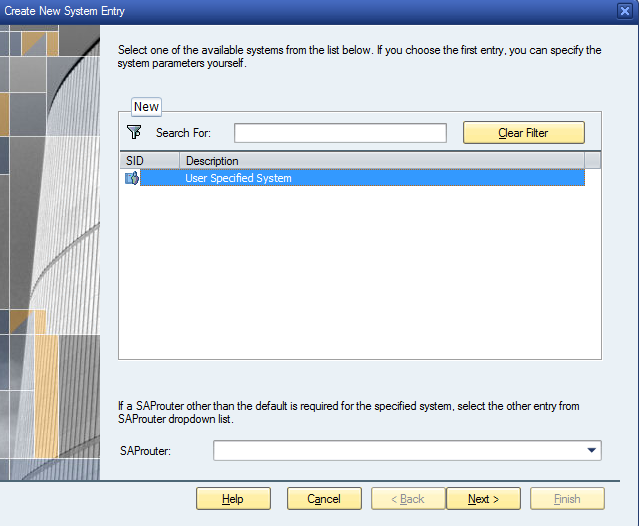
3. Fill in the connection details (they will be provided by a person responsible for installation of SAP system):
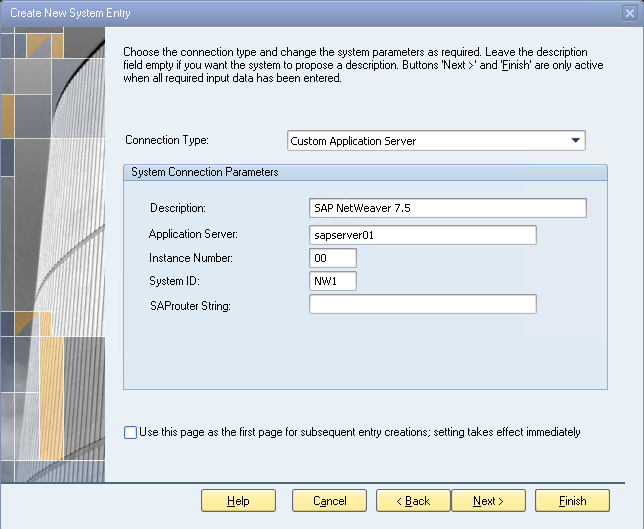
- Connection Type: Choose Custom Application Server (for one server/no load balancing).
- Description: You can put any description of the system, e.g. SAP Development System.
- Application Server: Enter IP address or Hostname of SAP application server.
- Instance number: Instance number of SAP system which is defined during SAP installation.
- System ID: SAP system ID with three character which is defined during SAP installation.
What is SAProuter String?
We leave the SAProuter String empty because we are not using SAProuter for SAP GUI connection. We use SAProuter string for connections outside of internal LAN and via internet. It is another option to access SAP GUI connection without using office VPN/network.
The requirement is to setup SAProuter (normally you should already have SAProuter connection to SAP OSS) with public IP. The SAProuter server should always resides in DMZ zone for security reasons. Using SAP router string means SAP GUI will first connect through SAProuter and then it will connect and route to SAP Application Server.
The connection from SAP GUI to SAProuter is a connection to port 3299 which is the standard port of SAProuter. To connect to SAPGUI or SAP Application Server it uses port 32XX and port 33XX for RFC through SAP Gateway. *XX is SAP system instance number.
Example:
SAProuter is running on a server with a public IP address 200.100.101.102 while SAP Application Server is running on a local IP address 10.10.11.12.
In this case, the SAProuter string in SAP Logon setup is H/<public IP of SAP Router>/S/<SAP router port>. In this example: /H/200.100.101.102/S/3299

On the SAProuter server, we need to allow port 32XX (Dispatcher port). In this example, it is port 3200 because the instance number is ‘00’. We need to maintain this in saprouttab file.
P * <your local IP address of SAP server> <your SAP server port>
in our example: P * 10.10.11.12 3200
Next, restart SAProuter services and don’t forget to open port 3200 in the firewall settings for SAProuter server.
4. Click Next button:
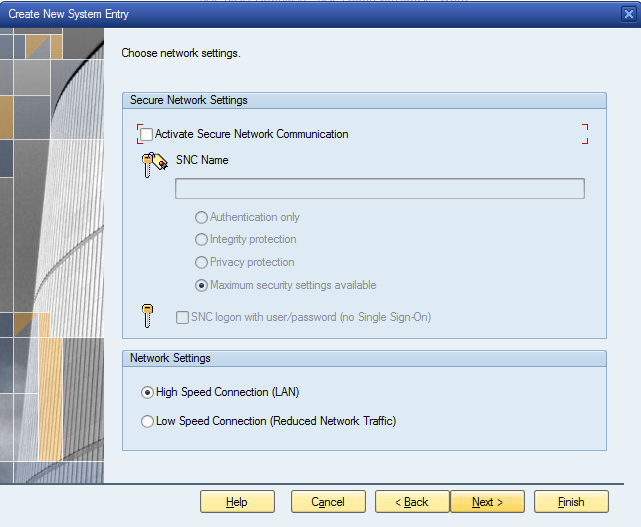
We didn’t tick Activate Secure Network Communication because we are not using SNC. SNC (Secure Network Communication) is an interface to provide security layer for communication to an external security product. SNC secures all communication between two SNC-protected products. For example, communication between SAP GUI and SAP Application Server. Only connections that use SAP protocols like RFC or CPIC will apply for SNC protection. The protection levels of SNC that can be applied are as below:
- Authentication only: Verification of the identity of the communication partners and this is minimum protection level.
- Integrity protection: System detection on manipulation of the data between the two communication channels.
- Privacy protection: System encryption of the messages and/or data being transferred.
5. Click Next button:
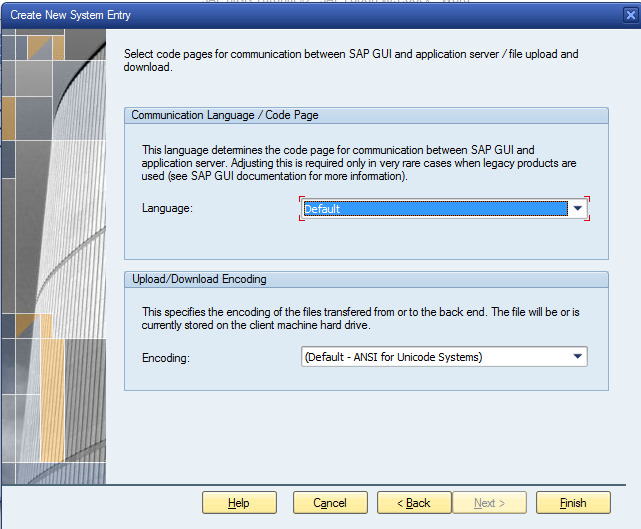
6. Click Finish button. Then, you can see the saved configuration entry in SAP Logon. Double click on the connection line to access the system.
Setting Up Logon Groups
Logon groups are used for load distribution or load balancing. They dynamically distribute user access to application servers. Logon groups are only possible to configure for SAP systems with two or more SAP ABAP application servers. When users log on to access the system, the message server will check which application server currently has the best performance statistics or the fewest users and the new users will be routed to that application server.
To set up logon groups, please follow the steps described below.
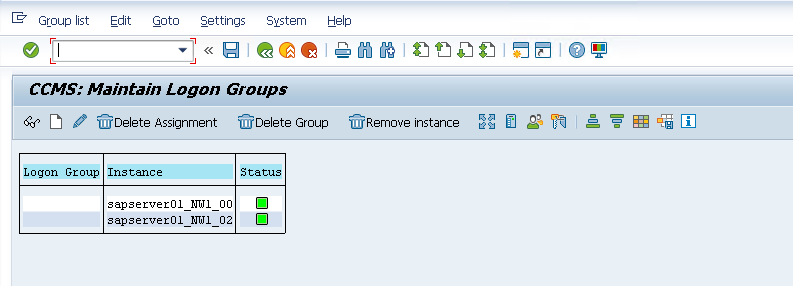
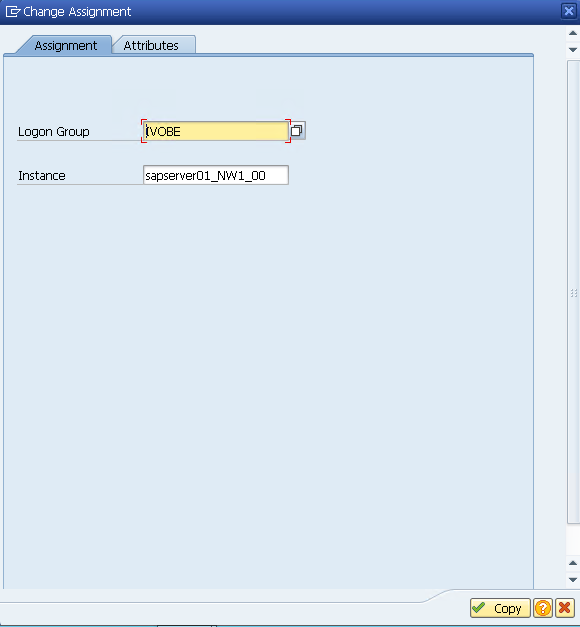
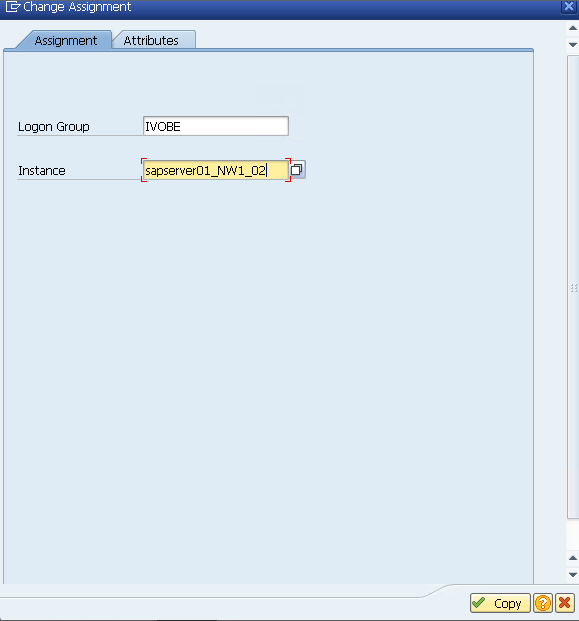
First, create a logon group. Run transaction code SMLG. Click Create button. Enter the name of a logon group (you can put any name). You can see two SAP instances sapserver01_NW1_00 and sapserver01_NW1_02. It means that there are two SAP instances or application servers that have been setup for one SAP system. In this example, we created logon group named IVOBE. Next, we will add SAP instances into logon group and click Copy button.
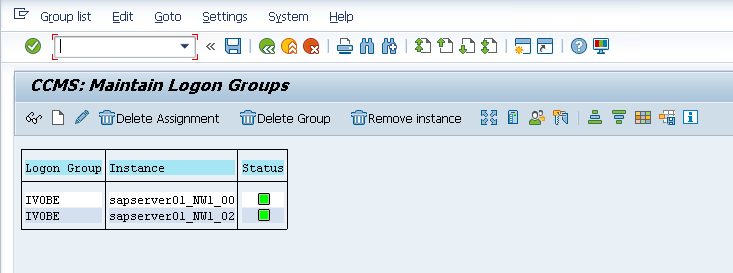
Click on Save button.
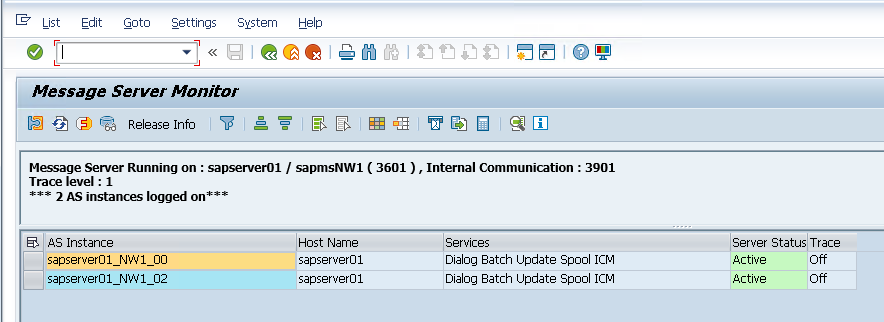
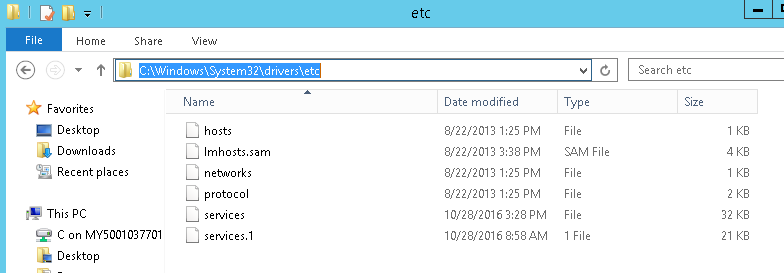
Before you setup SAP load balancing in SAP Logon group, you need to maintain SAP Message Server port number in Windows Services File. You can find SAP Message Server port number in the transaction SMMS.
Edit services file in C:\Windows\System32\drivers\etc folder.
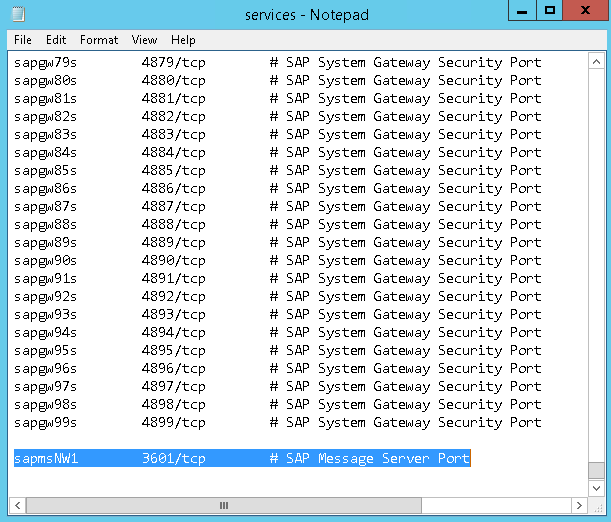
Add sapms<SID> <Message Server Port>/tcp # SAP Message Server Port
For example:
sapmsNW1 3601/tcp # SAP Message Server Port and press Enter before saving the file.
Setup load balancing with SAP GUI Logon. First, click on Create button and then select connection. Press Next button.
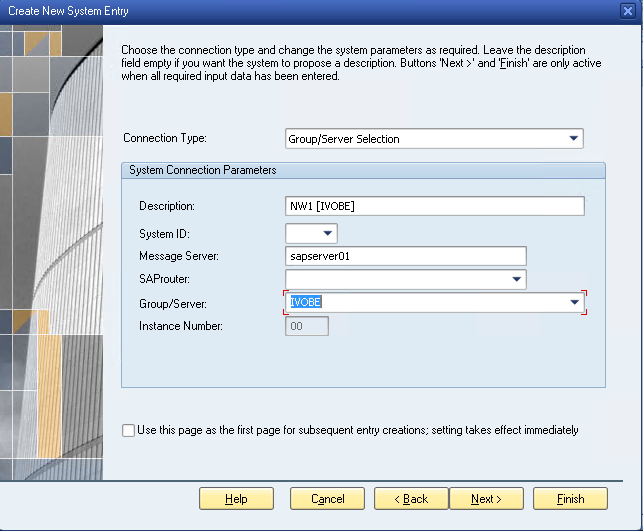
Select Group/Server Selection under connection type and then press Next button.

Enter SAP Message Server details and click Group/Server. You will see a list of SAP logon group and IVOBE group that you have created in SMLG transaction earlier. (SPACE is the default SAP Logon Group). Choose IVOBE logon group and press Next button. The description and instance number will be automatically selected by the SAP Logon setup. You can leave System ID blank because it will be automatically picked up. You can change Description before clicking Next button. Press Next, then Next, and then Finish buttons.
The SAP logon group has been setup and SAP GUI connection is ready. As you can see below, System ID NW1 is automatically selected because it is read from the message server configuration in the services. Remember that in the first tutorial, there was only one SAP message server for one SAP system.
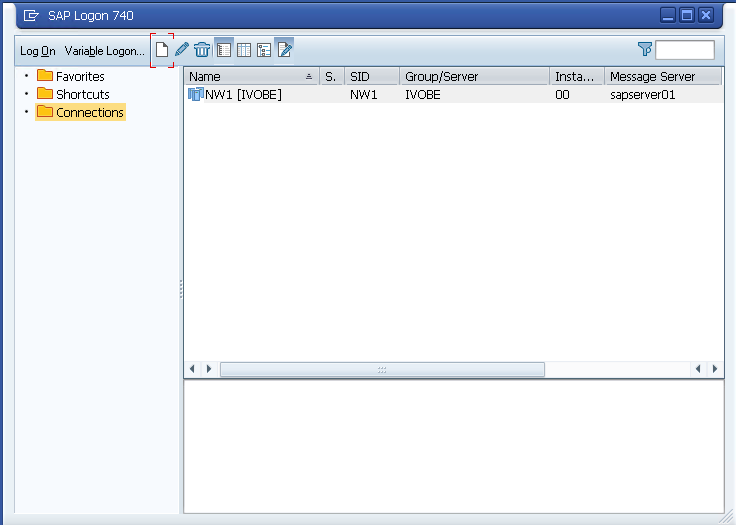
Double click the connection line to launch SAP GUI and access the SAP ERP system.
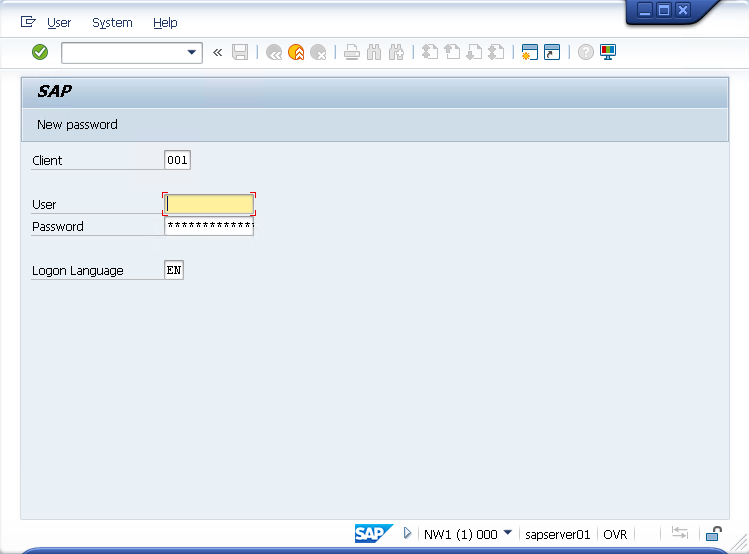
Now, you need to enter your user name with password and click Enter button for authorization in SAP system


Comments
Post a Comment